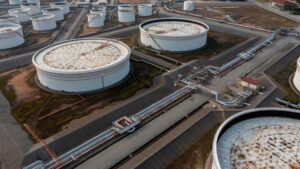
As a homeowner, ensuring the safety and integrity of your property is one of your top priorities. If you’ve recently had an oil storage tank removed from your property, It is critical to determine to soil containment that could pose risks, Here you see that why Soil Testing After Oil Storage Tank Removal. You may not realize how important soil analysis is after oil tank removal or the potential issues that could arise if contaminants have leaked into the surrounding soil. Professional soil testing following oil tank removal provides important information to properly address any soil or groundwater contamination before it becomes a costly problem. For peace of mind and to protect the health of your family, your property value, and the environment, soil testing should be conducted as soon as possible after oil tank removal.
Contamination Risks Following Oil Tank Removal
Following the removal of an underground oil tank, the surrounding soil should be tested for contamination as there are risks of hazardous chemicals leaching into the ground.
Soil contamination from oil tank
Oil tanks can release hydrocarbons and heavy metals like benzene, toluene, lead and arsenic into the soil over time through cracks, loose fittings or corrosion. These pollutants pose health risks if exposed to, ingested or inhaled. 1. Hydrocarbons can contaminate groundwater and release volatile organic compounds into the air. 2. Heavy metals accumulate in the body and environment, causing damage even in small amounts.
Soil Testing for oil tanks Procedures
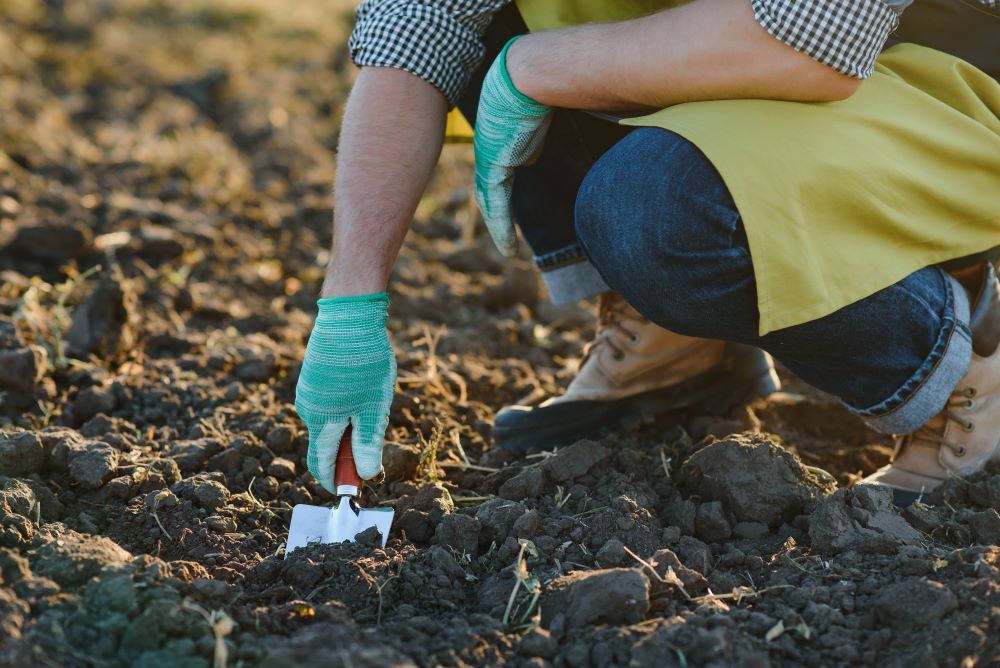
Soil testing should be done by an environmental professional to determine if remediation is needed. They will extract soil samples from around the tank area at multiple depths to assess the extent of contamination. The samples are then analyzed at a lab to check for high levels of total petroleum hydrocarbons (TPHs) and heavy metals. If elevated levels are detected, further testing may be required to develop a soil remediation plan.
Remediation and Regulations
The remediation steps will depend on the levels and types of contaminants found and local environmental regulations. Common methods include excavating and removing contaminated soil, or treating it on-site using chemicals, ventilation or microbes. Groundwater may also need to be treated. Most areas have strict requirements for the safe closure of underground oil tanks to protect public health, groundwater and the environment.
Following best practices for soil testing and remediation after oil tank removal is critical to ensure the safety of the area and comply with environmental laws. Protecting health and the planet should be top priorities.
Soil Testing After Oil Storage Tank Removal
Soil testing after oil tank removal is critical to determine if there are any oil tank contamination that require remediation. Proper soil analysis checks for a range of hazardous substances to evaluate the safety and health of the site.
How to test soil for oil contamination
Soil testing is done by collecting multiple soil samples from varying depths around the excavation site where the oil tank was removed. The samples are then sent to an accredited laboratory for analysis. Technicians will test for contaminants like benzene, toluene, ethylbenzene, and xylenes (BTEX), polycyclic aromatic hydrocarbons (PAHs), total petroleum hydrocarbons (TPHs), and heavy metals such as lead or mercury.
List of Soil testing for oil contamination
- BTEX are volatile organic compounds found in petroleum products like gasoline that can pose risks to human health.
- PAHs are carcinogenic chemicals formed during the combustion of organic materials like oil or coal.
- TPHs refer to a wide range of hydrocarbons found in crude oil and petroleum products. High concentrations require remediation.
- Heavy metals such as lead or mercury are toxic even in small amounts and may be present from the corrosion of oil tanks or piping.
The testing results will determine if the concentrations of any contaminants exceed regulatory limits. If contaminant levels are too high, remediation such as excavating and removing contaminated soil or groundwater treatment may be required before the site can be considered safe for its intended use.
Soil testing provides critical data to ensure the area where an oil tank was removed is suitable for its intended future purpose, whether residential, commercial or industrial. It should not be overlooked.
The Dangers of Not Testing Your Soil After Oil Tank Removal
Failing to test the soil after oil tank removal can have serious negative consequences. It’s crucial to analyze the soil to determine if there are any contaminants present before proceeding to the next steps of site remediation or redevelopment.
Health and Safety Hazards
Without soil testing, hazardous chemicals such as benzene, toluene, ethylbenzene, and xylenes (BTEX) could remain in the soil, posing risks to human health through direct contact or vapor intrusion into buildings. These carcinogens and toxins may lead to illnesses like leukemia or damage to the nervous system, liver, and kidneys. Proper soil testing helps identify any contaminants so they can be fully remediated before the site is deemed safe for its intended use.
Costly Delays and Legal Issues
If contaminants are discovered later through testing by a regulatory agency or due to health issues reported by site users, it can lead to costly delays, remediation, and even legal consequences. It is much more efficient and affordable to test the soil thoroughly after tank removal and address any issues upfront before proceeding to the next phases of the project. Proactively testing the soil also provides legal protection by ensuring all local and state requirements for site closure have been met.
Peace of Mind
For property owners and developers, soil testing provides peace of mind that the site is safe and environmentally sound. Comprehensive testing by a qualified environmental consultant uses advanced equipment and scientific methods to analyze soil and groundwater samples for a wide range of contaminants according to regulatory standards. Their final reports provide documentation and assurance that no unacceptable levels of contaminants remain before redeveloping the property.
In summary, soil testing should be an essential part of any oil tank removal process to avoid health hazards, unnecessary costs, legal issues, and development delays. While it may require an initial financial investment, soil testing provides critical information and helps ensure the safety, compliance, and viability of the site for its intended future purpose. The potential risks and expenses of not testing far outweigh the benefits of this vital environmental due diligence step.
Interpretation of soil analysis results
When you receive the report from your soil testing lab, it will contain several measurements that provide insight into the condition of your soil. Understanding these results is key to developing a remediation plan following an oil tank removal.
Soil Contaminant Levels
The report will indicate the levels of contaminants like benzene, toluene, ethylbenzene, and xylenes (BTEX) as well as polycyclic aromatic hydrocarbons (PAHs). These contaminants can pose risks to human health and the environment. Their concentrations will determine the approach for remediating and mitigating the impacts.
Soil pH Level
The pH level refers to how acidic or alkaline your soil is. Most plants prefer a pH between 6 and 7. If the pH is too high or too low, it may inhibit the breakdown of contaminants by soil microorganisms. Adjusting the pH level may be necessary to optimize conditions for bioremediation using plants, microbes, or other biological agents.
Nutrient Levels
The availability of nutrients like nitrogen, phosphorus, and potassium will also be indicated. Adequate levels of these macronutrients are important for plant growth and facilitating bioremediation. Supplementing nutrients may help stimulate plant growth, increase microbial activity, and improve the soil structure.
Recommendations
Based on the results, the report will provide recommendations for further testing or remedial actions to address any contaminants or deficiencies found. The recommendations aim to restore the soil to meet residential and commercial standards so the site can be deemed suitable for its intended use.
Carefully reviewing the soil analysis report with a qualified environmental consultant will help you develop an effective plan for remediating the site and ensuring the health and safety of any future occupants. Understanding the specifics of your soil’s condition is the vital first step toward successful mitigation of environmental impacts from an oil tank removal.
Next Steps to Take Based on Your Soil Test Results
Once you have your soil test results in hand, it’s time to determine appropriate next steps based on the findings.
Oil tank Remediation Required
If contaminants like heavy metals, benzene, or other volatile organic compounds were detected above regulatory limits, remediation will be necessary. This typically involves excavating and removing contaminated soil, then backfilling the area. The remediation method will depend on the types of contaminants present and their concentrations. It’s best to hire an environmental contractor to properly handle remediation.
Nutrient Deficiencies
Your soil test may reveal certain nutrient deficiencies like low nitrogen, phosphorus, or pH imbalance. Adding compost, fertilizer, or lime can help amend the soil and create better conditions for plant growth. Follow the recommendations provided in your soil test report for the proper amounts of nutrients to apply. Re-test your soil in 6-12 months to check if levels have improved.
All Clear
If the soil analysis shows contaminant levels are below actionable limits and nutrients are in the normal range, you have the all clear to move forward with the next stage of your project. However, it’s still a good idea to re-test in the future to ensure levels remain stable, especially if the area will be used for gardening or agriculture. Some contaminants can become more concentrated over time as water moves through the soil.
Regular soil testing provides vital information about your land’s current condition and helps ensure a safe, productive site for years to come. Carefully following the recommendations from your soil analysis report is key to successful remediation and creating optimum soil health. Be sure to keep records of all test results, remediation efforts, and amendments added to track the progress of your land over multiple years.
Want Step by step guide for Storage tank installation?
Conclusion
In summary, it’s critical to understand why soil testing after oil tank removal is so vital. As a homeowner, you need to take responsibility for the health and safety of your property. While removing an old oil tank is an important first step, the work is not done until a full soil analysis has been conducted by a licensed professional to determine if any contamination remains. Don’t cut corners here to save time or money; the potential long-term costs to you and future owners could be far greater. Make the investment now to give yourself peace of mind that your soil is clean and your family and community are safe from harm. It’s your duty as a responsible homeowner.